This year Holly is doing a year long look at countries throughout the world with Expedition Earth as our guide. We will augment with projects, books and materials as I see fit.
She just completed the first country on this world tour, China. We enjoyed a couple of weeks with China as materials available are amazing and plentiful. Fortunately we had some friends and family share some little artifacts and ephemera from China as well. Holly and I enjoyed the series on Netflix called Wild China, she read many books on China as well as story books from various China tales and folk lore. This along with some wonderful little crafts, projects, map work, a look at animals in China and amazing food -- made for a fantastic unit!
Holly's favorite part of this unit was the food... she adores Chinese food (Americanized of course). We had originally planned to find a nice restaurant to visit but she eventually asked if we could make her favorite meal at home together so that she would know how to again. Great idea!
She made chicken egg rolls, orange chicken (what she was really after) and rice. We also had bbq pork from the store. She made ALL of the food with my guiding her and adding food to any hot grease or ovens. The meal turned out perfect and was delicious!!! We will be making it again sometime soon I am sure.
Showing posts with label cooking. Show all posts
Showing posts with label cooking. Show all posts
Tuesday, October 2, 2012
Friday, October 21, 2011
How To Make An Apple Pie & See The World
Yesterday we used the book How To Make An Apple Pie And See The World as a focus for some fun studies after the core stuff was completed. This was a fun book for Holly to read - the illustrations are well done. This story takes a little girl around the world in search of ingredients to make an apple pie. Very whimsical!
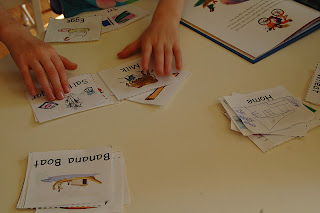
Once we were finished reading the story she narrated it to me, she is getting a little better at this now. Then we got our globe out and we traced her route so that Holly could visually see how far this little girl traveled. After viewing the globe Holly sequenced the story out with some story cards. She glued them down to a poster in order. Doing this project she had to revisit the book and work her way through it a bit slower.
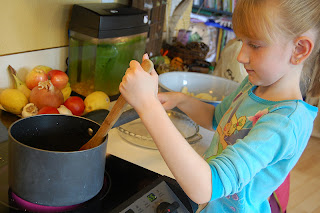
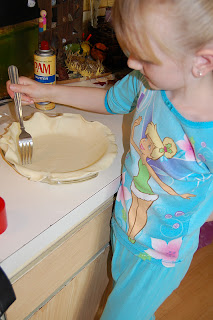
Then it was time for the fun part -- let's make an apple pie. I'll admit we took the easy route and used store bought crust to save on time. But, she learned a bit on how to peel an apple with my help and standing next to her working. She mixed all the ingredients of butter, sugar, cinnamon and flour to boil down on the stove. She laid the crust in the pan, pricked the bottom, layered in the apples, poured the sugary goodness in and got it ready for the top crust.
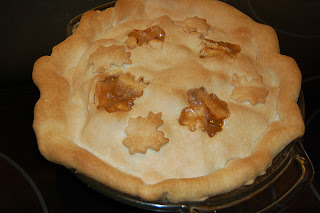
For the top crust we talked about different ways pies looked (full crust, weaved crust or cut crust) and she really wanted to do a cut crust. She looked through my cookie cutters and chose a small leaf to use. She made four cut outs, place the crust on and got a small lesson on crimping the crust together... and Holly did a great job. Once her edges were done well she added the little leaf cuts on and into the oven it went. Holly made a beautiful pie - I am rather proud of her work, patience and thoroughness! Good Stuff!
Wednesday, September 14, 2011
Blueberries For Sal
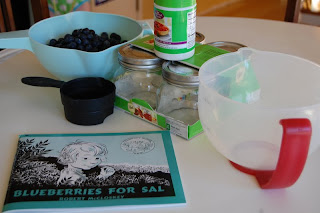
We spent a second day on the book Blueberries for Sal. Holly started off with reading this book aloud to Hudson and I. After reading it we talked about a Story Map reviewing the theme of the book, the setting, the characters, the problem and the solution. Holly then completed a story map on Blueberries for Sal - all on her own. I am quiet impressed with how well she did too!! Holly also created a Venn Diagram comparing the two characters of Sal and Little Bear. She enjoys doing these -- I need to plan in some more that would work well while she masters this skill.
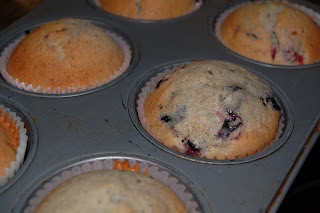
After she completed these two assignments we made blueberry muffins. We used a recipe I have used many time, so a keeper that is very simple and not over the top. Holly really enjoys cooking, this made for another great kitchen experience.
Here is the recipe we used: Easy Blueberry Muffins
After she completed these two assignments we made blueberry muffins. We used a recipe I have used many time, so a keeper that is very simple and not over the top. Holly really enjoys cooking, this made for another great kitchen experience.
Here is the recipe we used: Easy Blueberry Muffins
Wednesday, September 7, 2011
Blueberries For Sal & Freezer Jam
This morning Holly read Blueberries for Sal to me and then she made some blueberry freezer jam! All by herself!!!
She really enjoyed this activity and was surprised to learn she could make jam so easy... honestly, I am too. I have never made freezer jam - this was new to us both. I found a pectin that did not require any stove top work which was nice for Holly as it kept this pretty simple.
She measured out all the berries, washed them, smashed them, added them to the sugar and pectin mixture for a final mashing and then filled the little canning jars. Really a very simple, easy process that was fascinating to her - as well as a perfect match to this book in which they come home to can blueberries. Can't beat that!
Blueberry Freezer Jam
5 cups of blueberries
2 cups of sugar
6 tablespoons of instant pectin
3 pint canning jars or 6 1/2 pint
Wash and smash the blueberries really well. In a separate bowl mix sugar and instant pectin then add the berries. Mix really, really well for at about 3 minutes. Pour into canning jars leaving about 1/2 inch for expanding in the freezer. Let set for 30 minutes, cap and freeze. You can freeze for up to one year. Use within 3 weeks of opening.
Good Stuff!
Tuesday, September 6, 2011
Weekly Cooking ~ Chicken Tacos
Today Holly decided her weekly meal would be chicken tacos. We discussed the ingredients she would need, evaluated what we already had on hand and created a shopping list. Then we headed to the market to buy supplies (some day I'll bring my camera along to that too) and she helped with the entire transaction with the cashier.
Once home she unloaded the groceries and prepared. We did an easy version of this in which she shredded chicken from a roasted chicken, measured & mixed all of her ingredients and spices. Then she sauteed it all on the stove top... yes, the stove top. Under much guidance of course!!! She simmered it all down and sauteed the meat mixture - she also warmed the tortillas in a pan too! When all was said and done they were GREAT! This was a fun lesson for her with a meal she really enjoyed.
Once home she unloaded the groceries and prepared. We did an easy version of this in which she shredded chicken from a roasted chicken, measured & mixed all of her ingredients and spices. Then she sauteed it all on the stove top... yes, the stove top. Under much guidance of course!!! She simmered it all down and sauteed the meat mixture - she also warmed the tortillas in a pan too! When all was said and done they were GREAT! This was a fun lesson for her with a meal she really enjoyed.
Thursday, August 25, 2011
Making Ice Cream
Yesterday we enjoyed a beautiful sunny day at one of our favorite parks, Wildwood Park. But to make the fun even BETTER we hosting an ice cream making day with our homeschool group - it was fun!
This is such an easy and fun little project that can be done anywhere. You take a gallon ziploc bag and fill it about 1/4 full of ice and six tablespoons of ice cream rock salt. Then you take a quart size ziploc bag and fill it will 1 tablespoon sugar, 1/2 cup cream and 1/4 teaspoon of vanilla. Seal this ziploc bag really well and place it inside the gallon size bag of ice & salt. Seal the gallon bag up really well and start 'working' the bag - shake it, shimmy it, roll it and wiggle it. Shake all the ice cream makings around in that ice until it is frozen... about five to ten minutes. Then open and enjoy the ice cream ~ DELICIOUS!!!
This is such an easy and fun little project that can be done anywhere. You take a gallon ziploc bag and fill it about 1/4 full of ice and six tablespoons of ice cream rock salt. Then you take a quart size ziploc bag and fill it will 1 tablespoon sugar, 1/2 cup cream and 1/4 teaspoon of vanilla. Seal this ziploc bag really well and place it inside the gallon size bag of ice & salt. Seal the gallon bag up really well and start 'working' the bag - shake it, shimmy it, roll it and wiggle it. Shake all the ice cream makings around in that ice until it is frozen... about five to ten minutes. Then open and enjoy the ice cream ~ DELICIOUS!!!
Subscribe to:
Posts (Atom)


